
Mar 13, 2026
How to Take Stunning Wedding Ring Photos That Show Off Custom Details

LISA
Krikawa’s Key Takeaways:
- Use natural, indirect light or diffused daylight to avoid glare and highlight gemstone sparkle in wedding ring photos.
- Focus on the nearest detail such as prongs or engravings for sharp, professional wedding rings images.
- Keep rings clean and steady using a tripod or solid surface for crisp, detailed shots.
- Shoot in RAW or use macro mode on smartphones to capture fine textures and precise detail.
- Edit with care by cropping, sharpening, and correcting color to keep wedding rings pictures natural and radiant.
Attempting to capture wedding ring photos that do justice to your artisan, hand-crafted ring doesn’t always mean hiring a professional. Sure, good lighting helps, but with a little guidance on how light, focus, and storytelling come together, you can create gorgeous shots that highlight every custom detail.
Have a professional camera? Or just the latest smartphone? Either way, here are a few key techniques that can make your wedding ring images look stunning.
Framing the Art You Wear
You know that your ring represents multitudes more than a milestone. This is the story of how you fell in love and the road you’ve traveled together. It’s also about a shared vision and a work of art made to be like no other.
So, when it comes to documenting it? The goal isn’t just ‘get a clear enough shot.’ You want to capture that unique character: the curve of a bezel, the layers of patterns within Mokume gane grain, and the way a gemstone catches the light.
High-quality wedding ring pictures preserve those details forever. A perfect moment in time to relive the beauty and intention behind the design.
Step 1: Prepping the shot: Find the Light
Lighting is everything in photography, no matter what object you take photos of. The difference between a dull image and a radiant one often comes down to the direction of light and its softness.
If you’ve never had to think about lighting, think about standing outside at noon on a perfectly sunny day. For some, it’s so bright it hurts our eyes harshly. That sort of harsh light often washes away color and shadows. What you need is diffused light, and to do so, you can:
- Find a window in your home that often has natural, direct sunlight.
- Now, diffuse the harshness of that direct sunlight by:
- Placing a sheet of thin parchment, wax, or printer paper between the light and where you position your ring.
What to do if your windows don’t get enough natural light? You can build a simple reflector. A piece of cardboard covered in aluminum foil, or another piece of white paper held near the light, can reflect the light back onto the ring and gem itself.
Step 2: Prepping the Ring and Composing the Shot
Even the most flawlessly designed ring and cut gem can appear lackluster through everyday wear. Before taking wedding ring photos, gently polish your precious ring with a microfiber cloth.
Composing Your Shot
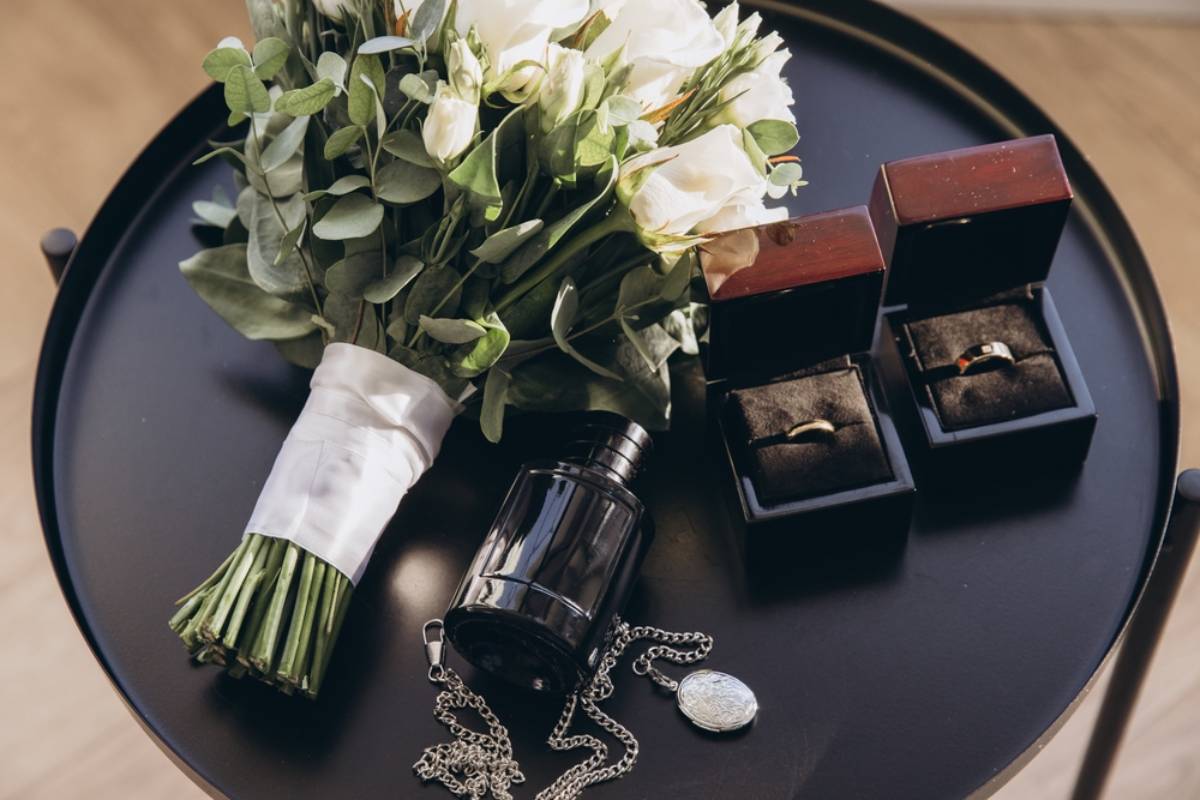
We have the main character, your ring—but what’s the stage? Here’s where you can get creative. A clean background, such as a simple white or color (easy tip: silver, white gold, or platinum often shines in charcoal or navy shades), can make the entire focus on your stunning ring.
Other items you can use in your photos:
- Your wedding invitations
- The ribbon from your bouquet or the bouquet itself
- Fabric swatches from your ceremony’s theme
- Keep it simple and choose just a pretty surface to lay the ring on, with a plain white background
- Vow books
- Wedding shoes
- The ring box itself
Adding these details can create a personal story to accompany your unique ring.
Step 3: Focus on the Details You Want to Capture Most
Macro focus is the best way to reveal the minute, breathtaking details hidden in the smallest of places: prongs, engravings, secret gems, and hand-forged textures. Focus on the aspect that matters most to you and let the rest become softly blurred. That selective focus gives your photo dimension and guides the viewer’s eye directly to the craftsmanship you adore.
Using a DSLR or mirrorless camera? Switch to manual focus to play and learn precision. For extreme close-ups, try focus stacking. (That’s when you take several images at different focal points and blend them later for full-depth clarity if you wish.)
Set your aperture to between f/8 and f/16 for sharpness, keep the ISO low (100 – 200), and use a tripod for a stable surface to eliminate shake.
Step 4: No DSLR? No problem: Smartphone Photography Tips
Current flagship smartphones can rival some models of professional cameras when used correctly to take pictures of wedding rings. For ring photography, use the rear camera because it offers higher resolution. Activate the macro mode if available, or attach a clip-on macro lens, an affordable upgrade that captures fine details.
Here’s how to take the photos:
- Tap and hold your phone’s screen to lock focus and exposure. Then, depending on your phone, find your brightness or exposure setting and slide it to fine-tune it.
- If you notice in the first few photos that diamonds, gemstones, or metals appear too bright and details are lost, lower the exposure or brightness slightly until you can see detail in the brightest parts again.
- For best results, if your smartphone has it, shoot in RAW format, as that will allow you more flexible editing later.
- Use a tripod to stabilize your phone, or prop it securely against a solid object. Even the slightest movement can blur close-up shots.
- Take multiple photos from every and any angle and play with settings: slight changes in lighting and focus often produce unexpectedly stunning images of wedding rings.
Step 5: Optional – Editing that Enhances Gently, Not Distorts
Once you’ve taken your shots, editing can help refine them even further. You can use programs like Lightroom, Snapseed, or your phone’s native photo editor. Whichever editor you use, aim for natural enhancement, not heavy filters.
- Crop tightly to emphasize detail
- Increase sharpness slightly to highlight texture
- Adjust white balance again if the metal tone still looks off (platinum should appear cool; yellow gold should glow warmly)
- Avoid over-saturation or too much contrast, as that can make the photo look unrealistic.
You’ll know that you’ve hit the ‘sweet spot’ in editing when the photo looks like your ring does in real life—only with better lighting.
Professional Cameras vs Phone Cameras: Can They Both Shine?
Yes. If you’re a hobbyist or a professional with all the gear you need, or can hire a professional, go for it.
If you’re budget-conscious, your existing smartphone is likely more powerful than you think. A simple clip-on lens, natural, diffused sunlight, and a bit of patience can deliver professional—or extremely close—quality pictures of your wedding rings. DIY reflectors, combined with free editing apps, still often yield extraordinary results.
Your Ring, Your Journey, Captured in Every Facet
Great wedding ring pictures capture more than the surface details. They reveal intricate, hand-crafted moments of exquisite artistry meant to represent who you are, who you love, and the memories created together. With mindful lighting, precise focus, and a few creative personal touches, anyone can create stunning wedding ring photos that showcase everything they love.
From preserving your new Krikawa custom ring as a keepsake photo to sharing it with friends, family, and loved ones, these techniques will help your ring look remarkable.
Crafted to be worn and adored every day. Designed to be unforgettable. Every Krikawa ring begins as an idea and becomes a lasting work of art.
Blog image taken by David Mendoza III.
Look Around


